Is your old oven struggling to preheat, or are you in the middle of remodeling a cozy kitchen and need an appliance that fits without overwhelming the space?
Whatever design dilemma you’re facing, we can help you find the perfect appliance fit. For homeowners in smaller kitchens, condos, or apartments, a 24 inch wall oven provides the perfect balance of performance and compact design.
Its streamlined size makes it versatile for modern layouts, while still offering all the cooking power you need for everyday meals or special gatherings. Proper installation of a wall oven isn’t just about sliding it into a cabinet. Safety, performance, and warranty coverage all depend on getting the process right from the start.
As your trusted oven installation guide, Slager Appliance is here to walk you through this process. From guiding you on wall oven dimensions to ensuring your new unit is securely connected, we’ve got the expertise to help make your kitchen project a success.
Pre-Installation Checklist: What You Need to Know
Before you begin, take the time to confirm a few essentials. First, determine if your kitchen is equipped for an electric wall oven or if you’ll need to consider gas wall oven installation requirements. This is one of the most critical steps since the type of connection dictates both the installation process and safety codes.
Next, measure the available cabinet space and confirm the 24 inch wall oven cutout dimensions. Wall ovens typically come in 30, 27, and 24 inch sizes. This slim oven option usually requires a cabinet opening of approximately 22 to 23 inches wide, 27 to 28 inches high, and 23 to 24 inches deep. Always check the manufacturer’s specifications for exact measurements.
Finally, inspect your current cabinet setup and wiring or gas supply to make sure everything is ready for installing single wall oven models. A little preparation here prevents big headaches later.
➜ Learn More: Top 8 Features of Today’s Electric Wall Ovens
Tools and Materials You’ll Need
Having the right equipment on hand makes installation much smoother. At minimum, you’ll need:
- Screwdriver set
- Power drill
- Measuring tape
- Carpenter’s level
- Voltage tester
- Adjustable wrench
For safety, always wear gloves and safety goggles when handling heavy appliances. Materials you may need include mounting screws, brackets, wire connectors, and possibly a new junction box or gas connector, depending on the oven type.
Some ovens include basic hardware in the packaging, so check your owner’s manual before making an extra trip to the hardware store. This preparation step is a key part of any successful wall oven installation.
How to Install a 24-Inch Wall Oven in Simple Steps
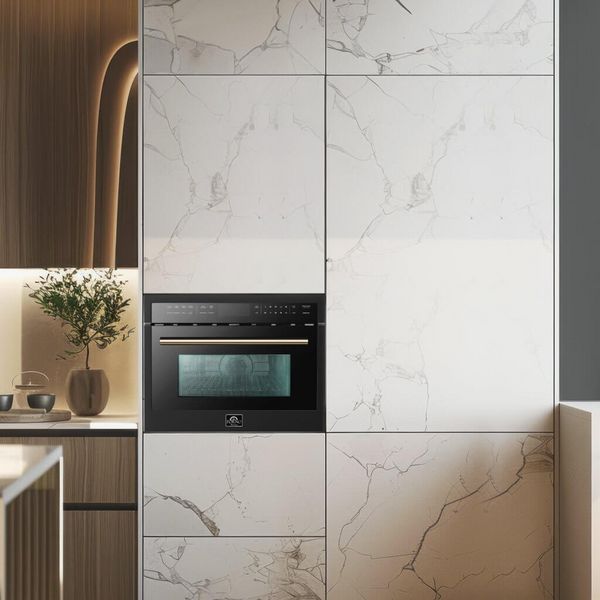
Let’s walk through the process step by step:
- Shut off utilities: Turn off electricity at the breaker panel for electrical appliance installation or shut off the gas supply if applicable.
- Remove the old oven: If you’re replacing a 24 inch wall oven, carefully disconnect wiring or gas lines before sliding it out. Have someone else with you for safety purposes.
- Prepare the cabinet: Ensure the cutout matches the required size and reinforce the cabinet if needed. Double-check the wall oven dimensions to confirm fit.
- Connect wiring or gas: For electric models, match the wires (black to black, white to white, green/bare to ground) and secure with connectors. For gas models, follow all gas wall oven installation requirements, using a flexible connector approved for ovens.
- Secure the oven: Slide the oven into the cabinet and use brackets or screws to fasten it firmly in place.
- Level and align: Use a carpenter’s level to make sure the oven is perfectly straight to avoid uneven cooking.
- Test functionality: Restore power or gas and run a test cycle to confirm the oven heats properly.
Here’s a quick comparison of installation requirements:
| Feature | Electric Wall Oven | Gas Wall Oven |
|---|---|---|
| Connection | Requires a 240V electrical line | Requires a gas line plus 120V electrical outlet |
| Tools Needed | Voltage tester, wire connectors, junction box | Wrench, gas connector, leak detection solution |
| Permits | Often required for new wiring | Usually required for new gas lines |
| Complexity | Moderate—suitable for DIYers with electrical experience | Higher—gas safety concerns make professional installation recommended |
DIY or Pro? Know When to Get Help
Many homeowners feel comfortable tackling simple kitchen renovation projects, but installing a wall oven can be more complicated than it looks. Some appliance pros consider wall ovens as one of the appliance installations you ought to leave to the professionals.
If your kitchen needs new electrical wiring, a dedicated circuit, or an extended gas line, this work should only be performed by a licensed professional. Not only is it safer, but it also ensures compliance with local building codes.
Permits may also be required for both electrical and gas work. At Slager Appliance, our Cedar Rapids installation team can handle these details for you, making the process stress-free. If you’re confident with basic carpentry and wiring, a kitchen appliance DIY approach may be possible, but never hesitate to call in the pros when safety is on the line.
Replacing an Existing 24 Inch Wall Oven
If you’re replacing a 24 inch wall oven with another unit of the same size, the job is often much simpler. The existing cutout will usually be correct, and the electrical or gas connections may already be in place. However, you’ll still want to verify compatibility, especially if your old unit has outdated wiring or non-standard connectors.
Here are a few pros and cons to keep in mind:
DIY Replacement Pros
- Saves on installation costs
- Faster turnaround if the connections already match
- Offers hands-on experience with your appliance
- Risk of damaging cabinetry during removal
- Possible hidden wiring or gas line issues
- No professional warranty coverage on the installation
DIY Replacement Cons
Sometimes, what starts as a simple swap turns into a larger project, which is why our team at Slager Appliance is always ready to help.
➜ Learn More: Wall Oven and Microwave Combo: A Buyer’s Guide
Best 24 Inch Wall Ovens at Slager Appliances
Keep reading to learn more about four of our favorite 24 inch wall oven models. When you purchase an oven at Slager, you can also expect a smooth delivery process, professional installation, excellent warranty options, and top-notch, local customer service.
GE 24” Stainless Steel Electric Built In Single Oven
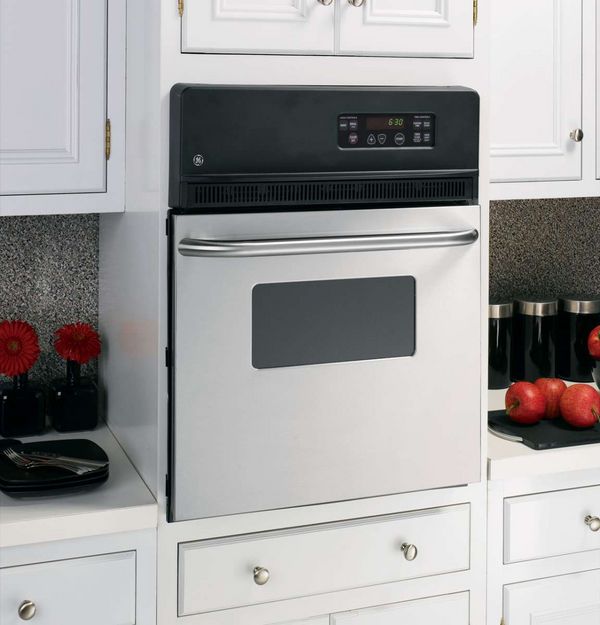
Shop GE 24” Stainless Steel Electric Built In Single Oven
The GE 24” single wall oven combines everyday practicality with smart design. Its ClearView window and interior light make monitoring meals effortless, while multiple oven rack positions let you cook multiple dishes at once.
Easy-to-clean frameless glass adds style, and the audible preheat signal ensures meals start on time. Overall, it’s ideal for small kitchens or apartment owners seeking compact convenience without sacrificing performance.
Top Features
- ClearView window for easy monitoring
- Multiple oven rack positions for cooking flexibility
- Frameless glass oven door for easy cleaning
Bosch 500 Series 1.6 Cu. Ft. Stainless Steel Electric Speed Oven
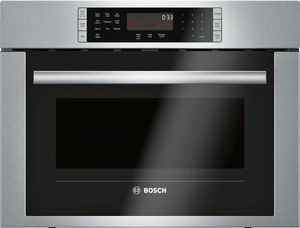
Shop Bosch 1.6 Cu. Ft. Electric Speed Oven
The Bosch 500 Series speed oven delivers fast, even results with convection cooking and a Triple Distribution Turntable Disk. SpeedChef cooking cycles save time, making it perfect for busy families or professionals who want quality meals quickly.
The flush install and matching white touch control LCD blend seamlessly with Bosch’s wall ovens, steam ovens, and warming drawers for a sleek, integrated look.
Top Features
- Convection cooking for even results
- SpeedChef cooking cycles for faster meals
- Triple Distribution Turntable Disk for uniform heating
GE 24” Stainless Steel Electric Built In Double Oven
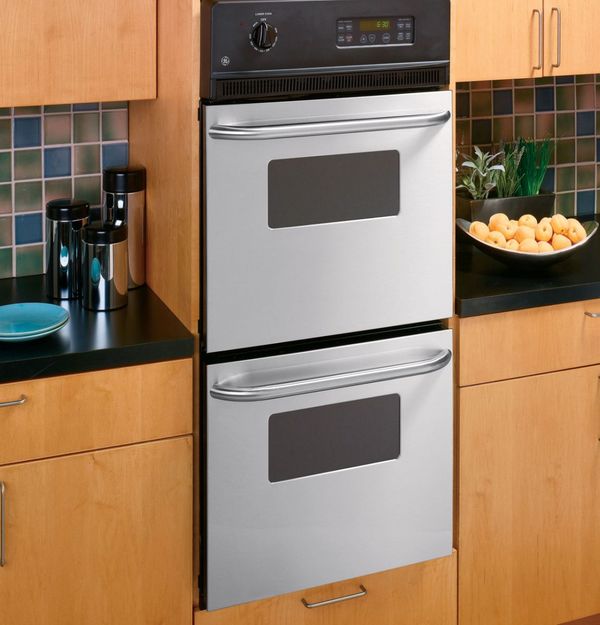
Shop GE 24” Stainless Steel Electric Built In Double Oven
The GE 24” electric double oven maximizes cooking capacity in a compact footprint. Two 2.7 cu. ft. ovens allow you to bake and broil simultaneously, making it ideal for households that entertain or cook multiple dishes at once.
Features like ClearView windows, interior lights, and frameless glass doors simplify monitoring and cleaning, while certified Sabbath mode supports religious observances.
Top Features:
- Dual 2.7 cu. ft. ovens for simultaneous cooking
- ClearView windows and interior lights for easy monitoring
- Frameless glass doors for easy cleaning and modern style
Start Cooking Smarter with the Right Wall Oven
A 24 inch wall oven is an excellent choice for compact spaces, but its benefits only shine when it’s installed correctly.
From safety concerns to performance optimization, following a careful step-by-step process ensures your investment pays off for years to come.
At Slager Appliance, we’re proud to serve Cedar Rapids homeowners with high-quality products and professional installation services. Whether you’re diving into a DIY project or leaving it to the experts, our team is here to guide you every step of the way.
Visit us in-store or explore our wall oven collection online to find the perfect fit!
➜ Learn More: Convection Oven vs Air Fryer: Is There a Difference?
Frequently Asked Questions
You’ll need a screwdriver, drill, voltage tester, level, and measuring tape, plus safety gear like gloves and goggles. Other necessary materials include wire connectors, mounting brackets, and possibly a new junction box. Always check the installation manual for your specific model.
If the existing cutout and wiring are in good condition, many homeowners can handle a basic replacement. However, if new wiring or gas connections are needed, it’s best to hire a professional to ensure safety and code compliance.
Most 24 inch wall oven cutout dimensions fall between 22–23 inches wide, 27–28 inches high, and 23–24 inches deep. Always confirm with the manufacturer’s specifications, as measurements may vary slightly.
Yes, permits are often required for both electrical and gas work, especially if new wiring or gas lines are being installed. Check with your local building authority or consult with our installation team at Slager Appliance.
Installing single wall ovens usually takes about 1 to 3 hours, depending on the complexity of the project. Replacements tend to be quicker, while new installations requiring wiring or gas line work will take longer.
Why Trust Slager Appliances?
Founded over 70 years ago, Slager Appliances is a family-owned, independent appliance retailer based out of Iowa City, IA. Slager has competitive prices and industry knowledge in delivering and installing all major appliance brands. Large enough to offer competitive pricing yet small enough to continue offering the “white glove” service we pride ourselves on, our focus is always on the customer experience — from the first step into a showroom to the purchase transaction to well after your new appliance has been installed.
Whether you need to replace an old appliance, or if you’re remodeling and need an entire kitchen full of new brand-name products we are with you all the way. We will work with you to find a product that fits your needs, budget, and lifestyle.
Shop 24 Inch Wall Ovens at Slager Appliances
Don’t put off until tomorrow what you can do today, and shop appliances online at Slager Appliances. Our friendly experts are always happy to help you find the best 24” oven for your cooking needs— whether you call us at 319-337-3833, email us, or use our online chat feature. Better yet, stop by any of our Slager Appliances in Iowa City, IA. Visit us today!